How to Take Stunning Travel Photos: Tips and Tricks for Every Hiker
Discover essential tips and techniques for capturing breathtaking travel photos during your hikes. Whether you’re a novice or seasoned adventurer, this guide offers practical advice to help elevate your photography game and immortalize your outdoor memories.
Understanding Your Gear and Composing the Perfect Shot

Hiking is more than just a physical journey—it’s a visual adventure. The breathtaking vistas, mist-covered mountains, and serene forest paths beg to be captured. However, taking professional-level photos while exploring the great outdoors requires a blend of technical knowledge and artistic intuition. In this first part, we’ll focus on choosing the right gear, understanding camera settings, and composing the perfect shot.
1. Know Your Gear: Camera or Smartphone?
Choosing the right equipment is the first step to capturing unforgettable moments on the trail.
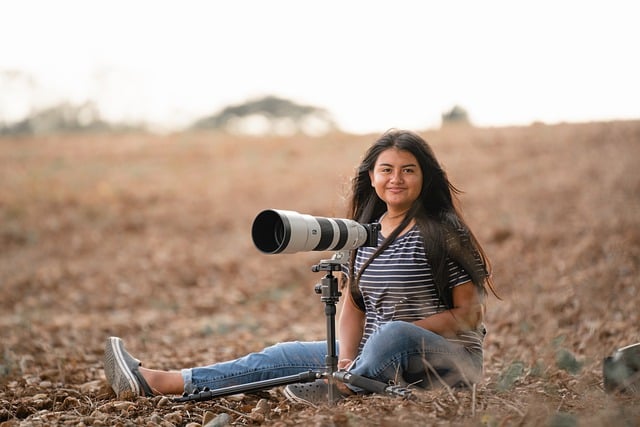
DSLRs and Mirrorless Cameras: These cameras provide excellent image quality and allow greater creative control with manual settings. They are ideal for landscapes and wildlife photography but can be heavy to carry on longer hikes.
Smartphones: Modern smartphones with advanced cameras are excellent for travel photography, offering convenience and portability. With the right techniques, you can produce stunning images, even on a smartphone.
Pro Tip: If carrying a heavy camera sounds daunting, opt for a lightweight mirrorless camera or invest in smartphone lenses to boost your phone’s capabilities.
2. Mastering the Golden Hour: The Best Time to Shoot
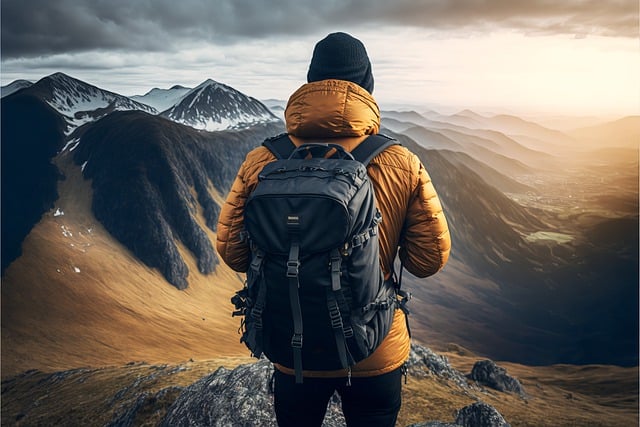
The time of day dramatically affects your photos. The “Golden Hour”—just after sunrise and before sunset—is the perfect window for photographers. During this time, the sun is low, casting soft light that enhances colors and textures without harsh shadows.
On the other hand, the Blue Hour (twilight before sunrise or after sunset) provides a dreamy, cooler tone, which can elevate moody landscape shots. If you're hiking at dawn or dusk, these moments are worth capturing.
Pro Tip: Plan your route so you reach scenic spots during these lighting windows. Check weather apps to time the sunrise or sunset perfectly.
3. Rule of Thirds: The Foundation of Composition
One of the easiest ways to compose stunning shots is by following the rule of thirds. Imagine breaking your frame into a 3x3 grid. Position key elements—like the horizon, trees, or mountains—along these grid lines or at their intersections to create a balanced and visually appealing composition.
Many cameras and smartphones have an option to display a grid overlay on the screen, helping you apply this technique in real time.
Pro Tip: Don’t place your subject in the dead center of the frame unless you’re going for a symmetrical or artistic effect. Experiment with framing elements slightly off-center for more dynamic results.
4. Foreground, Midground, and Background: Add Depth to Your Shots

When shooting expansive landscapes, including multiple layers in your composition will create a sense of depth. Use a nearby object (like rocks or flowers) as the foreground, focus on the trail or trees as the midground, and let the horizon or mountains form the background.
This layered approach adds richness to your images and draws viewers into the scene, giving them a sense of the environment’s scale.
Pro Tip: Position yourself low to the ground to emphasize the foreground and make the landscape more immersive.
Using Lighting, Angles, and Creativity to Tell Your Story
Photography is not just about documenting; it’s about storytelling. In the second part of this guide, we dive deeper into the creative aspects—playing with lighting, experimenting with angles, and capturing the essence of the experience.
5. Use Natural Light Creatively
Understanding how to manipulate natural light will take your photography to the next level. If you’re hiking through shaded forests or cloudy mountains, look for diffused light, which softens harsh shadows. Similarly, backlit subjects during sunrise or sunset can produce magical silhouettes.
Lens Flare: Embrace lens flare creatively by shooting directly into the sun, creating dreamy, artistic effects.
Side Lighting: Position the sun to the side of your frame for dramatic shadows and highlights, adding depth and texture to your shot.
Pro Tip: Always carry a small microfiber cloth to clean your lens—it’s easy to get smudges when hiking.
6. Experiment with Angles: Look Up, Look Down
Perspective can change the mood of a photograph. While most people naturally shoot from eye level, exploring different angles will add variety to your shots.
High Angle Shots: Climb onto rocks or hills to capture sweeping landscapes from above.
Low Angle Shots: Crouch down or lie on the ground to highlight interesting textures or objects in the foreground.
Bird’s Eye View: If you have a drone, aerial shots can provide breathtaking views that are impossible to capture on foot.
Pro Tip: Use leading lines like trails, rivers, or ridges to draw the viewer’s eye through the image, giving your photo a sense of direction and movement.
7. Capture Movement: Tell the Story of Your Adventure

Hiking isn’t just about still landscapes—it’s an experience filled with motion, whether it’s the rustling of leaves, flowing rivers, or your fellow hikers in action. Capturing movement brings life and dynamism to your photos.
Long Exposure: Use a slower shutter speed to blur moving water or clouds, creating a soft, ethereal effect.
Action Shots: Capture your friends mid-step, jumping over rocks, or interacting with nature to convey a sense of adventure.
Pro Tip: If your camera or phone has burst mode, use it to capture fast-moving subjects. You can select the best shot later.
8. Be Patient and Embrace Spontaneity
Nature doesn’t always cooperate, and the perfect shot can take time. Some of the most breathtaking moments—like wildlife appearing unexpectedly or the sun breaking through clouds—happen when you least expect them.
Stay patient and allow the environment to reveal its beauty. If you plan to photograph animals, move slowly and quietly to avoid startling them. The best photos often come from waiting for the right moment rather than rushing through the hike.
Pro Tip: Always bring extra batteries or a power bank. There's nothing worse than running out of power just as the perfect photo opportunity arises.
9. Post-Processing: Elevate Your Photos with Editing
Even a well-composed photo can benefit from a little post-processing. Use editing apps like Lightroom, Snapseed, or VSCO to enhance your images. Adjusting the exposure, contrast, and saturation can make colors pop and bring out details that might be lost in the raw photo.
Filters: Use filters sparingly to maintain the natural feel of your travel photos.
Cropping: Fine-tune the composition if needed, following the rule of thirds or adjusting for balance.
Pro Tip: If you shoot in RAW format (available on many DSLRs and some smartphones), you’ll have more flexibility in post-processing without losing image quality.
10. Don’t Forget to Enjoy the Moment
While capturing your journey is rewarding, remember to strike a balance between photographing and fully experiencing the adventure. Some of the best memories are the ones you live, not just the ones you document. Put the camera down every once in a while and immerse yourself in the sights and sounds of nature.
Taking stunning travel photos as a hiker is as much about preparation and patience as it is about creativity and intuition. With these tips and tricks in mind, you’ll be well on your way to capturing the beauty of every trail you explore. Happy hiking—and happy shooting!

